
Effective Overseeding Techniques for Fall Lawn Renewal
Why Overseeding Is Important for Lawn Health
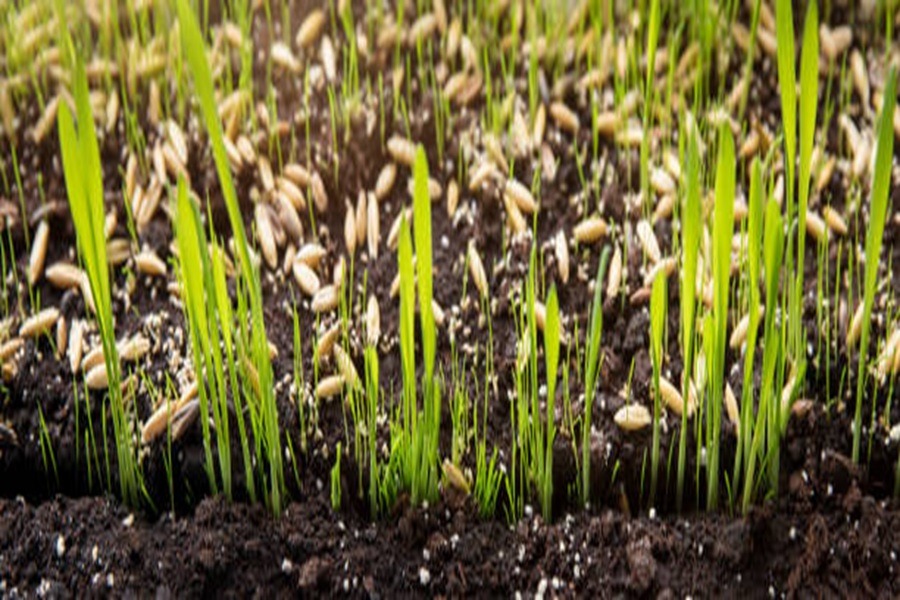
Overseeding is a critical part of maintaining a healthy, vibrant lawn, especially in the fall. It involves spreading grass seed over an existing lawn to improve its density, repair bare spots, and enhance its resistance to diseases and pests. By introducing new life into an established lawn, overseeding helps create a lush and uniform landscape.
Benefits of Overseeding
- Improved Lawn Density
Overseeding fills in thin or patchy areas, creating a thicker turf that not only looks appealing but also improves the overall health of the lawn. - Weed Suppression
A dense lawn naturally limits the space available for weeds to grow. By overseeding regularly, you can reduce weed infestations without relying heavily on herbicides. - Enhanced Disease Resistance
Older lawns are often dominated by one or two species of grass that may be prone to specific diseases. Introducing new varieties through overseeding increases genetic diversity, helping your lawn resist diseases more effectively. - Increased Drought Tolerance
Newer grass seed blends are often bred to withstand drought conditions better than older varieties. Overseeding allows you to incorporate these advanced grasses into your lawn, leading to better water efficiency. - Repairing Damage
Foot traffic, pets, summer heat, or pest infestations can leave your grass damaged and thin in some areas. Overseeding rejuvenates these spots without the need for costly sod replacement.
The Role of Seasonality in Lawn Health
Fall is particularly important as it provides ideal conditions for grass growth: – Soil temperatures are warm enough for seed germination. – Cooler air temperatures reduce stress on young seedlings. – Moisture from rain (or irrigation) supports consistent growth. – Fewer weeds compete with newly germinated grass in fall compared to spring.
By addressing underlying issues such as thinning turf or bare patches now, you prepare your lawn to thrive during the colder months and emerge stronger when spring arrives.
Visualizing Lawn Improvement Through Overseeding
| Lawn Challenge | Effectiveness of Overseeding |
| Thin or Patchy Grass | High – Fills gaps and thickens turf |
| Weed Growth | Medium – Reduces space for weeds |
| Susceptibility to Disease | High – Introduces resistant varieties |
| Drought Stress | Medium – Adds tolerant grass types |
| General Aesthetics | High – Improves uniformity and greenery |
Long-Term Impact on Your Landscape
Regular overseeding not only addresses immediate issues but also contributes to long-term improvements in soil health and biodiversity. The root systems of young grass plants aerate the soil naturally, improving water infiltration and reducing compaction over time. Additionally, introducing grasses suited to your climate ensures that your lawn remains sustainable with fewer inputs like water and fertilizer.
By understanding why overseeding is essential for lawn health—and incorporating it into your seasonal maintenance routine—you can create a green space that’s both beautiful and resilient year-round.
Best Time for Fall Overseeding
Timing plays a crucial role in the success of fall overseeding. Choosing the optimal window ensures that seeds germinate effectively, establish strong roots, and thrive throughout the season. Here’s what you need to know about selecting the best time for overseeding your lawn during fall.
Why Fall Is Ideal for Overseeding
Fall is considered the best season for overseeding because of its favorable growing conditions:
– Cooler Temperatures: Moderate daytime temperatures and cooler evenings create an ideal environment for seed germination and growth. Most grass varieties thrive in these mild conditions.
– Reduced Competition: Weeds are less aggressive during fall, giving new grass seedlings more room to develop without competing for nutrients, water, and sunlight.
– Improved Soil Moisture: Autumn rains help keep the soil moist, which is critical for seed germination and early root development.
The Optimal Timeframe
- Cool-Season Grasses (e.g., Kentucky Bluegrass, Fescues): For homeowners in northern regions or areas with cool-season grasses, late summer to early fall is ideal — typically between late August and mid-October. This allows seeds to establish before frost arrives.
- Warm-Season Grasses (e.g., Bermuda Grass, Zoysia): While warm-season grasses are generally seeded in spring or summer, some may benefit from dormant seeding just before winter starts. Typically, this occurs after soil temperatures drop below 50°F but before freezing begins.
To determine the exact timing:
– Monitor local weather forecasts to avoid seeding immediately before heavy frost or prolonged dry spells. – Consult a soil thermometer or use regional planting calendars tailored to your area.
Key Timing Tips
Keep these tips in mind when planning your overseeding schedule:
– Start at least 6–8 weeks before your region’s first expected frost date so seedlings have enough time to establish roots. – Avoid waiting too late into fall as colder temperatures can slow down germination and stunt growth. – If you’re unsure about timing specifics, reach out to local agricultural extension offices or lawn-care professionals familiar with your climate zone.
| Region | Ideal Overseeding Period |
| Northern U.S./Cool Zones | Late August – Early October |
| Transition Zone | Mid-September – Late October |
| Southern U.S./Warm Zones | Dormant seeding after November |
Additional Considerations Based on Grass Type
Understanding your grass type will also inform how you approach fall overseeding: – Cool-season grasses planted at the optimum time in early autumn will thrive during their natural peak growth period. – Overseeded warm-season lawns may require adjustments if transitioning from warm-weather growing patterns.
By carefully planning based on seasonal weather patterns and grass types relevant to your region, you’ll set up your lawn for long-term health and vitality through effective fall overseeding efforts.
Tools and Equipment Needed for Overseeding
When it comes to overseeding your lawn, having the right tools and equipment is crucial to ensure success. Proper preparation and execution not only make the process easier but also significantly boost the chances of achieving a lush, healthy lawn. Below is an overview of essential tools and how each plays a role in effective overseeding.
Essential Tools for Overseeding
- A mower is used to trim the existing grass to a shorter height before overseeding. This ensures that seeds can make direct contact with the soil.
- Use a mower with sharp blades to avoid damaging your grass as you prepare.
- Aeration creates small holes in the soil, improving airflow, water penetration, and seed-to-soil contact.
- Core Aerators: Remove small plugs of soil for better results.
- Spike Aerators: Create holes by pushing spikes into the ground (best suited for smaller areas).
- A seed spreader ensures even distribution of grass seeds across your lawn.
- Broadcast Spreaders: Ideal for covering large areas quickly.
- Drop Spreaders: Provide more precision, helpful along edges or in smaller sections.
- Essential for removing thatch (a layer of dead grass and debris) before overseeding.
- Leaf Rakes: Useful for light cleanup.
- Dethatching Rakes: Designed specifically to remove thick layers of thatch.
- Ensures consistent watering after seeding without disturbing seeds on the soil surface.
- Choose sprinklers with adjustable settings to match your lawn’s size and watering needs.
- Helps measure pH levels and nutrient composition in your soil so you can address deficiencies before overseeding.
- Topdressing Materials (optional)
- Compost or a light layer of topsoil can be applied over seeds to protect them from wind or birds while maintaining moisture.
Additional Equipment for Larger Lawns
- Power Dethatcher: Speeds up removal of excessive thatch compared to manual raking.
- Lawn Roller: Can help press seeds into soil after application, improving germination rates on uneven terrain.
| Tool | Purpose | Best For | Notes |
| Lawn Mower | Cuts grass short | All lawn sizes | Use sharp blades |
| Aerator | Improves air/seed penetration | Small-to-large lawns | Core aerators preferred |
| Seed Spreader | Even seed distribution | Precision or large areas | Broadcast for speed |
| Rake | Removes debris/thatch | Pre-seed preparation | Dethatching rake recommended |
| Hose/Sprinkler | Watering | Post-overseeding care | Adjustable settings preferred |
Pro Tips When Using These Tools
- Clean all tools before use, especially aerators and spreaders, to prevent contaminating your lawn with weeds or diseases from previous use elsewhere.
- When using an aerator or dethatcher, avoid overly compacting saturated soils — wait until they’re moist but not soggy.
- Calibrate your seed spreader according to manufacturer guidelines; uneven application can lead to patchy growth.
Equipping yourself with these tools ensures you’re ready for every step in the overseeding process — from preparation through maintenance — giving you the best chance at achieving a thriving autumn lawn renewal project.
Preparing Your Lawn for Overseeding
Proper preparation of your lawn is essential for a successful overseeding process. It ensures that seeds have the best chance to germinate, root, and thrive. By taking the time to prepare effectively, you can set the foundation for a lush, healthy lawn.
Step 1: Assess Your Lawn’s Condition
Before beginning any preparation work, evaluate the current state of your lawn. Understanding its health will help you identify specific areas needing attention. Consider these factors:
– Existing Grass Density: Are there bare spots or thinning areas?
– Weed Presence: Is your lawn overrun with weeds that may compete with new seeds?
– Soil Condition: Does the soil feel compacted or lack nutrients?
If your soil appears unhealthy or compacted, aerating and improving soil health should be prioritized during preparation.
Step 2: Mow and Remove Debris
Before overseeding, mowing the grass short (to about 1-2 inches) is critical. This allows seeds to reach the soil more easily and improves sunlight exposure. Follow these steps: 1. Set your mower height lower than usual, but avoid scalping the grass. 2. Rake away clippings after mowing to prevent them from smothering new seeds. 3. Remove debris such as leaves, sticks, or thick layers of thatch (if present).
Thatch thicker than ½ inch can inhibit seed-to-soil contact and should be addressed with dethatching tools or a rake.
Step 3: Aerate Compacted Soil
Compacted soil reduces airflow, water absorption, and root growth—all essential factors for successful overseeding.
- Use a core aerator to pull small plugs of soil from your lawn.
- Focus on high-traffic areas prone to compaction.
- Aeration improves seed-to-soil contact by creating channels for better penetration of water and nutrients.
Tip: If aerating isn’t feasible due to time or resources, use a garden fork to manually loosen compacted spots.
Step 4: Test and Amend Your Soil
Healthy grass starts with well-nourished soil. Before spreading new seed: 1. Test Soil pH – Use a home testing kit or send a sample to a local extension service. – Grass typically thrives in slightly acidic soil with a pH between 6.0–7.0. 2. Apply Amendments – Based on test results: – Add lime if pH is too acidic. – Use sulfur if pH is overly alkaline. – Apply organic matter like compost to improve nutrient content.
A properly balanced soil environment encourages faster germination and robust growth.
Step 5: Weed Control
Weeds compete aggressively for resources like sunlight and nutrients during germination: – For severe weed infestations, apply an herbicide at least two weeks before overseeding. – Avoid using pre-emergent herbicides right before seeding since they can inhibit grass seed growth as well.
Natural methods like hand-pulling weeds may also work in smaller areas where herbicides aren’t necessary.
Summary Table: Key Preparation Steps
| Task | Tools Needed | Timing |
| Mow Lawn Short | Lawn mower | A few days before overseeding |
| Remove Thatch/Debris | Rake/Dethatching tool | Same day as mowing |
| Aerate Compact Soil | Core aerator/Garden fork | Immediately before seeding |
| Test & Amend Soil | pH test kit/Fertilizer/Compost | At least one week prior |
| Manage Weeds | Herbicide/Hand weeder | 2 weeks prior (if necessary) |
By following these preparation steps thoroughly, you’ll create an optimal environment where grass seeds can thrive during fall renewal efforts. Thoughtful preparation makes all the difference in achieving long-lasting results from overseeding efforts.
Common Mistakes to Avoid During Overseeding
Overseeding is a valuable process for revitalizing your lawn, but it must be done correctly to yield the best results. Mistakes in technique or timing can hinder the success of your efforts. Below are some of the most common overseeding mistakes and how you can avoid them.
1. Skipping Soil Preparation
Proper soil preparation is essential before spreading seeds. Failing to prepare the soil may result in poor seed-to-soil contact, reducing germination rates.
How to Avoid This Mistake: – Remove debris like leaves, twigs, or dead grass from your lawn. – Aerate the soil to reduce compaction and improve oxygen flow. – Rake lightly to expose bare soil where seeds can make contact.
2. Using the Wrong Grass Seed
Not all grass types will thrive in your region or under specific environmental conditions. Choosing incompatible seed may result in patchy growth.
How to Avoid This Mistake: – Select seeds suited for your climate (e.g., cool-season grasses for northern areas, warm-season grasses for southern regions). – Consider factors like shade tolerance, drought resistance, and foot traffic levels. – Use a mix of grass seed varieties for a more robust lawn.
| Grass Type | Best For | Characteristics |
| Kentucky Bluegrass | Cool climates | Lush texture and vibrant green color |
| Perennial Ryegrass | High foot traffic | Fast germination and durability |
| Fescues | Shady areas | Low maintenance and drought resistance |
3. Overseeding at the Wrong Time
Timing plays a critical role in overseeding success. Seeds planted too early or too late may not establish properly due to unfavorable weather conditions.
How to Avoid This Mistake: – Oversee cool-season grasses in early fall when soil temperatures are warm but air temperatures have cooled (around 50°F–65°F). – Avoid overseeding during extreme heat or cold.
4. Applying Too Much or Too Little Seed
Using an incorrect seed application rate can harm your lawn’s health. Overcrowding leads to competition for resources, while sparse seeding results in thin patches.
How to Avoid This Mistake: – Follow label instructions on recommended seeding rates (typically measured per square foot). – Use a quality broadcast spreader for even distribution.
5. Neglecting Watering Requirements
Failing to water regularly after overseeding is one of the most common errors homeowners make.
How to Avoid This Mistake: – Keep newly seeded areas consistently moist until seedlings are well-established. – Water lightly twice daily during the first week; gradually reduce frequency as roots develop more deeply.
6. Skipping Fertilization After Overseeding
Many people skip fertilization steps following overseeding, which deprives seeds of nutrients needed for optimal growth.
How to Avoid This Mistake: – Apply starter fertilizer immediately after spreading seed (choose one with phosphorus content for root development). – Continue feeding your grass every six weeks with balanced fertilizer designed for new lawns.
By avoiding these common mistakes during overseeding, you’ll give your lawn the best chance of thriving through fall renewal efforts and beyond. Careful planning ensures that time and resources invested yield lush, healthy results without setbacks occurring unexpectedly along the way.
Common Mistakes to Avoid During Overseeding
Overseeding can transform your lawn into a lush, green space, but even with the best intentions, certain mistakes can hinder your success. Being aware of these common pitfalls can save you time, money, and effort while ensuring your overseeding project yields the desired results.
Using the Wrong Type of Grass Seed
Selecting the wrong seed for your lawn is a frequent mistake that can prevent proper growth. To avoid this:
– Choose grass varieties that perform well in your specific climate or region (e.g., cool-season vs. warm-season grasses).
– Assess factors like sun/shade exposure, soil condition, and foot-traffic levels before purchasing seeds.
– Consult with local garden centers or extension services for guidance on the best seed blends for fall overseeding.
Overseeding Without Addressing Soil Health
Skipping an evaluation of soil health is a critical error:
– Test soil pH before overseeding; optimal levels generally range between 6.0 and 7.0 for most grasses.
– Amend soil with necessary nutrients such as lime (for acidic soils) or sulfur (for alkaline soils).
A healthy foundation ensures seeds germinate effectively and thrive long-term.
Ignoring Proper Lawn Preparation Before Seeding
Failure to prepare your lawn properly is another common issue:
– Mow existing grass to a short height (around 1–1.5 inches) for better seed-to-soil contact.
– Remove debris such as leaves or thatch buildup through raking or dethatching tools.
Neglecting these steps reduces germination rates significantly.
Overlooking Watering Requirements Post-Seeding
Improper watering undermines successful germination:
– Seeds need consistent moisture without becoming waterlogged; overwatering may cause rot while underwatering dries out seeds prematurely. – Lightly water twice daily until seedlings are established, then gradually reduce frequency.
Using Poor Quality Equipment
Subpar tools lead to uneven coverage: ensure equipment like aerators & spreaders operate smoothly
Post-Overseeding Care Tips
Once overseeding is complete, proper post-care is crucial to ensure the new grass seeds germinate successfully and grow into a thick, healthy lawn. Neglecting post-overseeding care can result in uneven growth or seed loss, so follow these strategies to get the best results.
1. Watering Schedule
Consistent moisture is key for seed germination. Newly seeded lawns require careful watering management to prevent seeds from drying out or being washed away.
- Frequency: Water lightly once or twice a day for the first 7–10 days, ensuring the soil remains consistently damp but not waterlogged.
- Depth of Moisture: Irrigate enough to moisten the top 1–2 inches of soil where seeds are germinating.
- Timing: Morning watering is ideal to minimize evaporation and fungal risks. If necessary, add a second light watering in early afternoon.
After seedlings develop and reach about 1–2 inches tall (typically within two weeks), gradually reduce the frequency of watering. Shift to deeper, less frequent irrigation (e.g., 2–3 times per week) in order to encourage deep root development.
2. Limiting Foot Traffic
- Use temporary barriers such as stakes with string or garden netting to mark off treated areas.
- Redirect pets and children away from the lawn until the grass has fully established, which generally takes about 4–6 weeks.
3. Fertilization Needs
| Phase | Fertilizer Type | Application Notes |
| Immediately After Overseeding | Starter fertilizer (high phosphorus) | Apply during overseeding or immediately after spreading seeds for strong root development. |
| 3–4 Weeks After Germination | Balanced fertilizer (equal NPK ratio) | Apply lightly to promote steady growth without overstimulation. |
Avoid over-fertilizing—it can lead to weak or patchy grass growth and may burn young seedlings.
4. Mowing Guidelines
- First Mow Timing: Wait until the new grass blades reach about 3 inches tall before mowing for the first time.
- Blade Settings: Use a sharp mower blade set at its highest cutting height (approximately 3–4 inches). This helps avoid excessive stress on young plants.
- Cutting Strategy: Never remove more than one-third of the grass height in a single mow.
Resume your regular mowing schedule only after new grass has fully matured.
5. Weed Management
- Avoid applying herbicides immediately after overseeding; most products are not safe for use on germinating grasses.
- If weeds become problematic during establishment, wait until your new turf is at least two months old before using targeted weed control solutions like selective herbicides.
Instead of chemical approaches in this sensitive stage, consider hand-pulling weeds when they appear small.
6. Monitor Progress
- Look for any bare spots where seeds failed to germinate; you might need additional attention like spot-seeding in these areas.
- Check for signs of disease such as yellow patches or mold growth caused by excessive moisture—adjust irrigation accordingly if issues arise.
By staying attentive throughout this period, you’ll ensure that your efforts lead to a lush lawn come springtime!
Tags: